My Favorite Seed Starting Supplies
I’ve been starting my own seeds for about five year and have tried a number of set ups. Seed starting can be done with minimal supplies or what you have on hand. It can also be done with dedicated supplies that you invest in and reuse year over year. There are even plastic-free methods for starting seeds. So whether cost, convenience, or sustainability is top of mind for you, there’s a method you can use.
Let’s dive into four popular seed starting methods, the pros and cons of each, and the supplies you need to grow seedlings indoors with each method.
A few of the links in this article are Amazon affiliate links, which means I receive a small commission at no extra cost to you if you click on the link and purchase the item. The links to stores outside of Amazon are not affiliated—they're just products I really like. All opinions remain my own.
Most Cost Effective
Use What You Have to Get Started
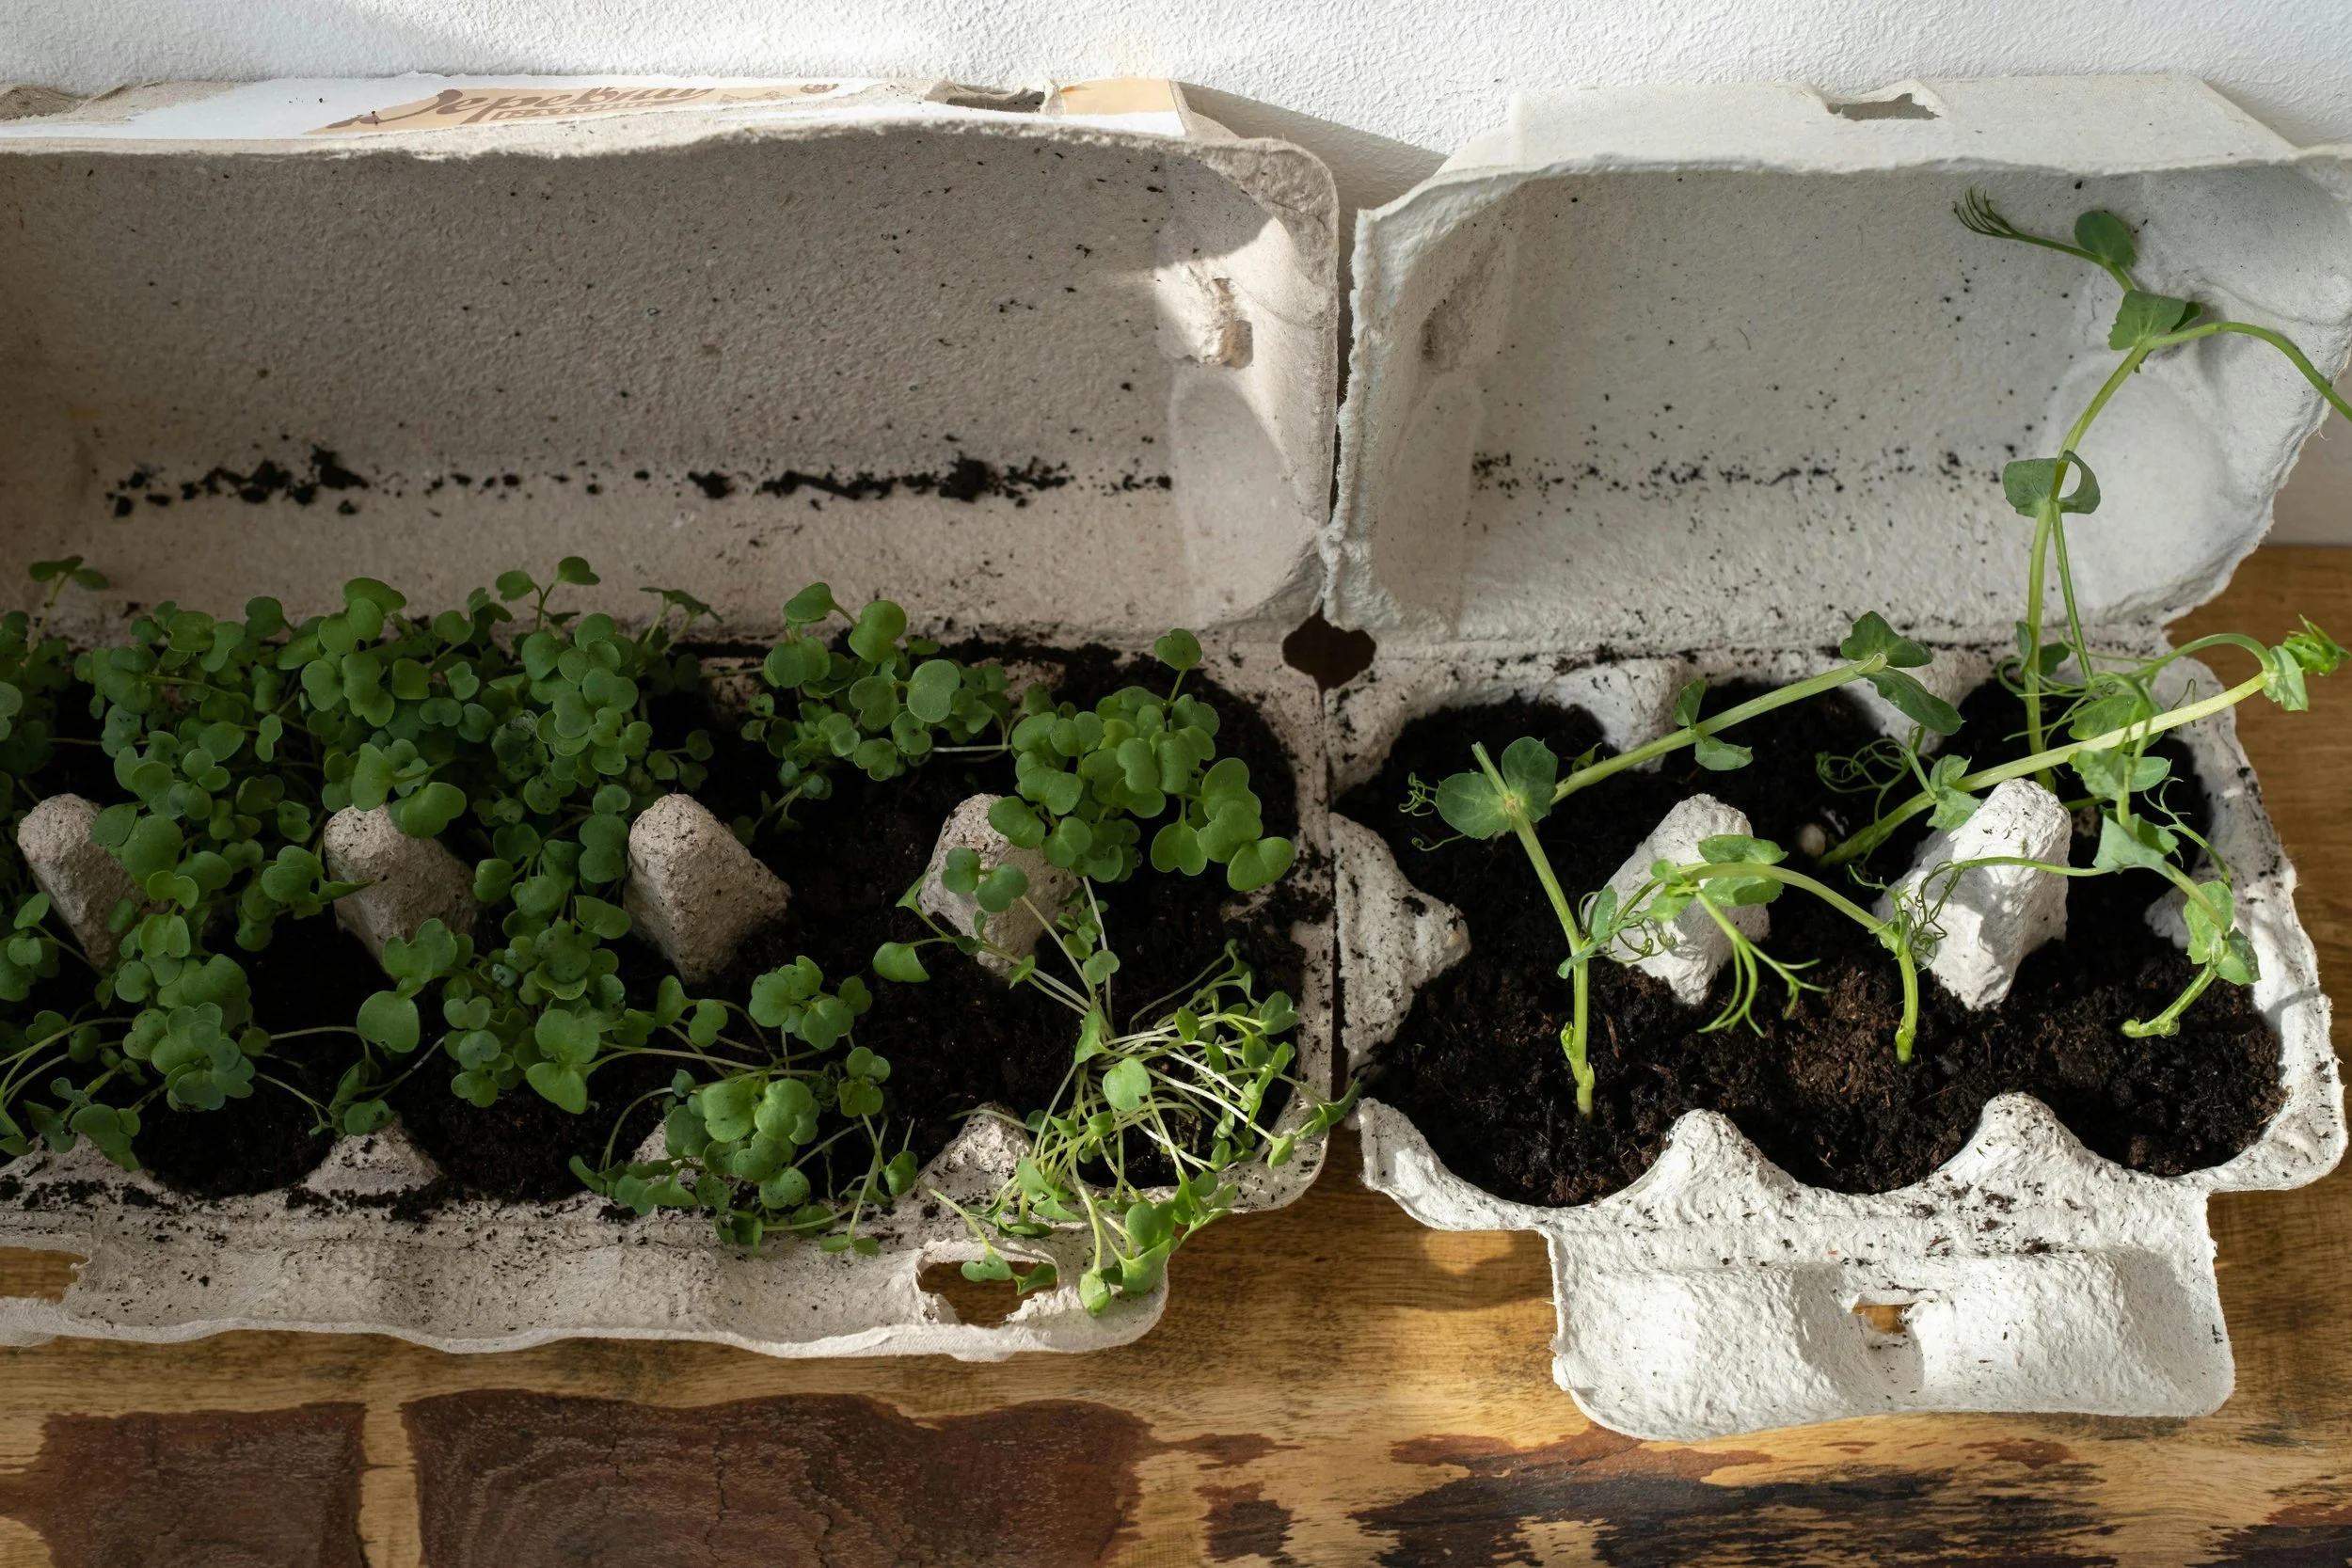
In the beginning I collected egg cartons, strawberry containers, toilet paper rolls, newspaper, and just about every other shallow container I could recycle in my house. I poked drainage holes if the container didn’t already have them, and set them on baking sheets and in casserole dishes to catch the water/allow me to water from the bottom up. I lined up the trays in a southern-facing bay window and watched my seedling emerge. It was incredibly exciting and I grew a lot of tomatoes, basil, and marigolds that year. If that’s where you’re at, it’s totally doable and a great, low-cost way to get started. The downside is that you can’t fit much dirt in an egg carton so the seedlings will need to be potted up into a larger container before long. A lot of people use solo cups for this. I used little terracotta pots that I salvaged from a retired gardener for free. As for the other containers like recycled produce containers, you have to separate the seedlings which can feel a little scary if you’re new to handling seedlings. Basically, with this method you are trading convenience for cost.
Use-What-You-Have Seed Starting Supplies
Egg cartons
Produce containers
Toilet paper rolls
Newspaper (rolled into little cups!)
Knife or metal skewer to poke drainage holes
Baking sheets
Seed starting soil mix
Solo cups
Small terracotta pots
More Convenient
Peat Pellets in a Seed Starting Kit
A little more convenient and still (sort of) cost-effective are those seed starting kits. What’s nice is you can grab these at nearly any local hardware store or garden center. It’s an easy entry point, and I tried this one year. The downsides are that the peat pellets aren’t very sustainable, you’ll still need to pot up the peat pellets, and the plastic trays are thin and break easily. It was too frustrating for me to handle a tray that cracked if I needed to move it, rendering it useless for catching water and making it single-use plastic.
Seed starting kits generally include:
Tray with drainage holes
Tray for catching water
Expanding peat pellets
Humidity dome
Most Convenient
Starting Seeds in Plug Trays
The past few years I’ve used 5 inch plug trays made of sturdy plastic because they are reusable and accommodate veggies, herbs, and native flowers nicely. They aren’t wide, but I’ve found that 5 inches is deep enough that I don’t need to pot up my seedlings before I harden them off or transplant them out in the garden. I ordered my set of plug trays from Greenhouse Megastore, and have expanded my collection by saving plug trays and plastic pots when I buy at the nursery. Some nurseries and plant centers will even give their used plug trays away for free. Just ask! I set the plug trays in 1020 trays and water the seedlings from the bottom. The downside of plug trays is that you’re still using plastic.
Supplies for Starting Seeds in Plug Trays
Seed starting soil mix
Most Sustainable
Start Seeds with Soil Blocking
With soil blocking, you’re eliminating the plastic plug trays and using a metal tool to create soil blocks. The soil blocks are then placed on tray and watered from the bottom. Shallow edge trays work best so you can drain off excess water. Soil blocking fans say this method produces healthier seedlings and encourages better root growth. This video does a great job of providing a quick overview of the process and benefits. Soil blocking does require an upfront investment of money (for longer-lasting supplies) and time (to learn a new skill). You’ll need a hand held soil blocker, trays to place the soil blocks on, and a bucket or bowl for preparing your seed starting mix. There are a lot of great seed starting soil recipes around the internet. You want a mix that will hold the block shape well. To minimize your upfront investment in this method, you could always start by investing in the soil blocker and using old plastic trays and baking sheets to start.
Soil Blocking Supplies
Seed starting soil recipe (like this)
A soil blocker
Setting Up Your Grow Station
You can place your seedlings in a southern-facing window but if you don’t get enough light, you’ll end up with weak, leggy seedlings that have stretched towards the sun. Grow lights will ensure you are able to start strong, healthy seedlings no matter the sunlight situation. Outlet timers help you set the lights to turn on for consistent hours each day. You can also add a heat mat during the germination phase to keep your soil warm and increase germination rates. Blowing a fan on your seedlings provides good air circulation, prevents disease, and encourages the seedlings to grow hardier stalks. If you don’t have a ledge or need more space, the ideal place to set your seedling trays is on a metal wire shelf near a window. You can easily hang the grow lights from the undersides of the shelves with zip ties.
Grow Station Supplies
Heat mat
Seed Starting Accessories
A few other supplies, you’ll want to consider to make life easier include:
Plant tags or painter's tape to label your seedlings
A turkey baster or long narrow watering can for watering seedlings
A temporary greenhouse for moving seedlings outdoors (This can be multipurpose - I start my fall seedlings outdoors in one of these!)